Skip to content

Cart

Your cart is empty

Article: DIY Wig Customization Tips: How to Add Highlights and Layers

DIY Wig Customization Tips: How to Add Highlights and Layers

DIY Wig Customization Tips: How to Add Highlights and Layers

Are you tired of your wig looking just like everyone else's? DIY wig customization is a rising trend, allowing individuals to achieve salon-quality looks in their own time and space.

In this post, we'll guide you step-by-step on how to add highlights and layers to your favorite wigs, making them uniquely yours. Let's dive right into the art of personalizing your wigs!


Tools and Materials Needed for Wig Customization

To customize your wig, you will need a highlighting kit, foil strips, a wig stand, sharp scissors, and a styling comb.


Highlighting kit

A highlighting kit is an essential tool for DIY wig customization. It often comes packed with all you need to add stunning stripes of color to your wig. Inside, you'll typically find a powder lightener, cream developer, and a mixing tray.

Some kits even include a special applicator brush that helps ensure the color goes just where it needs to be. With different shades available, you can create an array of looks from subtle sun-kissed strands to dramatic contrasting colors.

Just make sure to carefully follow instructions in the kit for best results!

Foil strips

To add highlights to your wig, you'll need foil strips. These thin strips of foil are used to separate and isolate the sections of hair that you want to highlight. They help protect the rest of the wig from getting colored by the highlighting solution.

By placing and securing the foils strategically, you can achieve a natural-looking highlight effect on your wig. Foil strips are an essential tool for anyone looking to customize their wig with highlights at home.

When layering your wig, foil strips can also come in handy. They can be used to section off different layers and keep them separated while cutting or styling. This helps ensure that each layer is evenly distributed and blends seamlessly for a professional-looking finish.

Wig stand

To customize your wig effectively, having a wig stand is essential. A wig stand will hold your wig securely in place while you work on it, making it easier to add highlights or layers.

It provides stability and allows you to see the entire wig as you customize it. Place the wig stand on a flat surface and secure the wig onto the stand using pins or clasps. This will ensure that your hands are free to style and manipulate the wig without any restrictions.

With a sturdy and reliable wig stand, you can confidently transform your wig into a personalized masterpiece.

Sharp scissors

To customize your wig with highlights and layers, you'll need a pair of sharp scissors. Make sure they are specifically designed for cutting hair to ensure clean and precise cuts. Dull or blunt scissors can lead to jagged edges and uneven layers, so it's important to invest in a high-quality pair.

The sharpness of the scissors will help you achieve professional-looking results when adding layers or trimming your wig. Take your time and use caution when using the scissors to avoid any accidents or damage to the wig fibers.

Styling comb

To achieve the perfect look for your customized wig, a styling comb is an essential tool. This comb is designed with wide teeth that are great for detangling and styling both synthetic and natural hair wigs.

It helps to distribute product evenly through the strands, ensuring a smooth and polished finish. With its sturdy construction, the styling comb can withstand regular use without breaking or bending.

Whether you're adding highlights or layers to your wig, this comb will help you create a flawless hairstyle with ease.

Adding Highlights to Your Wig

To add highlights to your wig, start by choosing the right color for your desired look. Then, apply the highlighting solution evenly throughout the designated sections of the wig using a brush or applicator.

Next, place and secure foil strips over each highlighted section to keep them separate from the rest of the hair while processing. Allow the color to develop according to the instructions on your highlighting kit, then rinse and style your wig as desired for a beautiful finished look.

Choosing the right color for your highlights

When it comes to choosing the right color for your wig highlights, consider complementary shades that will enhance your natural hair color. For African American women, warm tones like caramel, honey blonde, and copper can beautifully accentuate dark hair.

If you want a bolder look, try vibrant colors like red or purple. Consider your skin tone as well - if you have warmer undertones, opt for golden hues; cooler undertones pair well with ash or platinum shades.

Remember to take into account personal preference and the overall look you're trying to achieve.

Applying the highlighting solution

To add highlights to your wig, start by choosing the right color for your desired look. Once you have selected the color, apply the highlighting solution evenly onto small sections of the hair using a brush or applicator.

Make sure to saturate each strand from root to tip for even coloring. Place foils under each highlighted section and secure them in place. Allow the highlighting solution to develop according to the instructions provided with your kit.

Finally, rinse out the color, shampoo and condition as usual, and style your wig as desired for a beautiful finished look.

Placing and securing the foils

To add highlights to your wig, you will need to place and secure foils. Start by sectioning off small pieces of hair where you want the highlights to be. Take a strip of foil and fold it in half lengthwise, then wrap it around the sectioned hair.

Make sure the foil is tightly secured so that the highlighting solution doesn't leak out. Repeat this process for each highlighted section on your wig, making sure to leave enough space between each foil for an even distribution of color.

Once all the foils are in place, you can move on to applying the highlighting solution and letting it develop before rinsing and styling your customized wig.

Letting the color develop

After applying the highlighting solution and securing the foils, it's important to allow the color to develop. This process is crucial for achieving the desired shade of highlights in your wig.

The length of time needed for the color to develop may vary depending on the type of highlighting kit you're using, so be sure to carefully follow the instructions provided. While waiting for the color to develop, you can use this time to rinse out any excess coloring from your tools and prepare for styling your wig once it's done developing.

Rinsing and styling the wig

Once you've let the color develop, it's time to rinse and style your wig. Start by gently rinsing out the highlighting solution with lukewarm water until the water runs clear. Avoid scrubbing or twisting the hair to prevent tangling.

Next, apply a wig conditioner or detangling spray to keep the hair soft and manageable. Use a wide-tooth comb or your fingers to gently remove any tangles or knots. To style the wig, you can use heat tools like curling irons or straighteners on low settings if it's made from human hair, but be cautious not to damage synthetic fibers.

Once styled, allow the wig to air dry completely before wearing it again for best results!

Layering Your Wig

To layer your wig, start by preparing the wig and then cutting the layers using sharp scissors. Blend the layers together and style them to create a natural look.

Preparing the wig

Before you start customizing your wig, it's important to properly prepare it. First, make sure the wig is clean and free of any dust or product buildup. Gently brush through the strands using a wide-toothed comb to remove any tangles or knots.

If needed, use a mild shampoo and conditioner specifically designed for synthetic wigs to wash and condition the hair. Allow the wig to air dry completely before continuing with any customization techniques.

By starting with a clean and well-maintained wig, you'll ensure that your highlights and layers will look their best when finished.

Cutting the layers

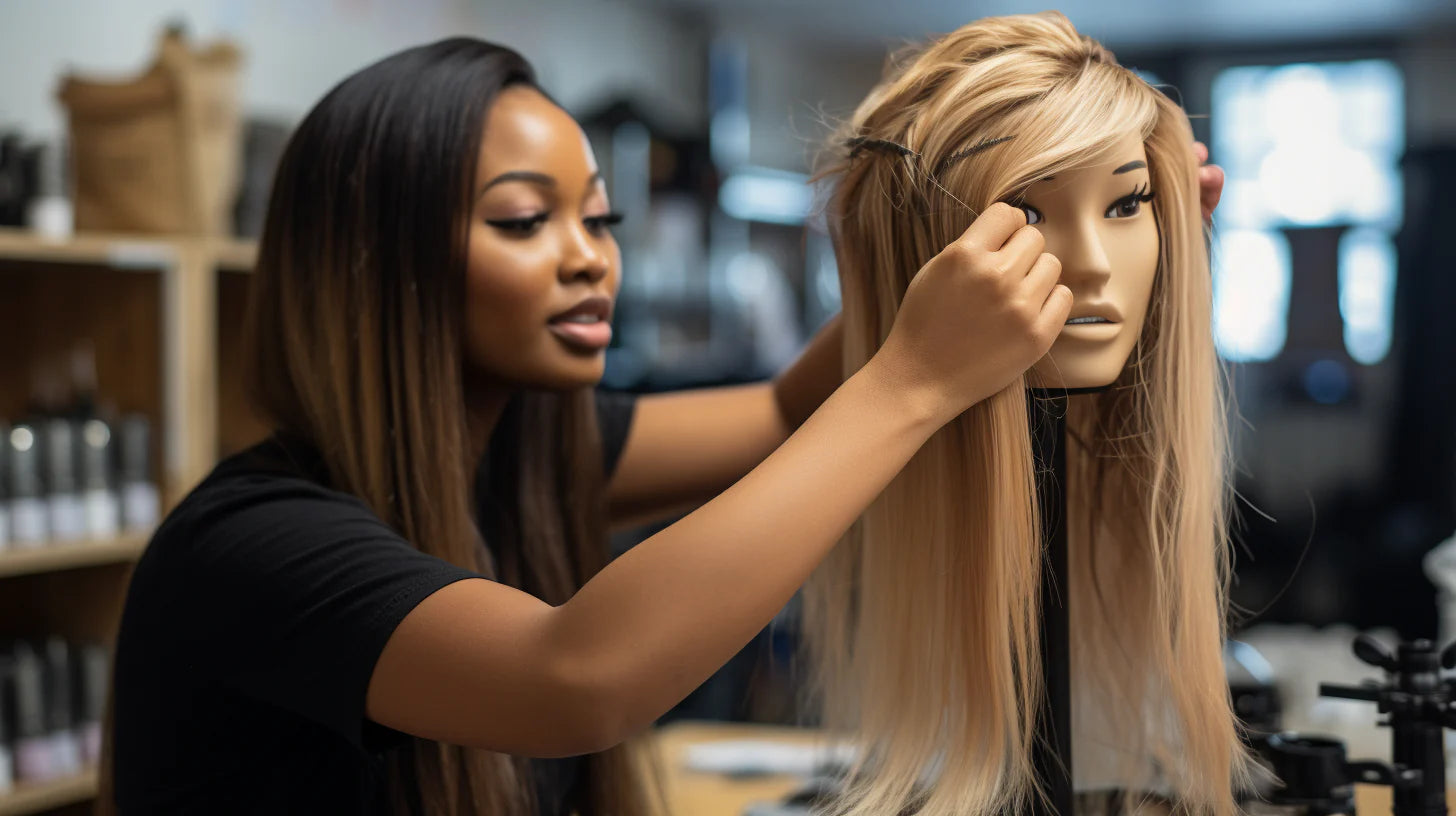
To achieve a layered look for your wig, start by preparing the wig and making sure it is securely placed on a wig stand. Take sharp scissors and begin cutting the layers according to your desired length and style.

Remember to take your time and be patient with each cut, ensuring that you are layering evenly throughout the wig. Once you have finished cutting the layers, carefully blend them together using a styling comb or brush for a seamless look.

This will give your wig added volume and dimension, creating a personalized style that suits you perfectly.

Blending the layers

To achieve a natural look with your layered wig, it's important to blend the layers seamlessly. This can be done by using a styling comb or your fingers to gently comb through the hair and blend the shorter and longer sections together.

Take care not to tug or pull too much on the strands, as this can cause breakage or damage to your wig. By blending the layers properly, you'll create a beautiful and voluminous hairstyle that looks effortlessly chic.

Styling the layers

To style the layers of your wig, start by gently combing through the strands to ensure they are smooth and detangled. Then, use a curling iron or straightener to add texture and shape to the layers.

You can create loose waves or sleek curls depending on your desired look. For added volume, tease the roots of each layer with a fine-toothed comb. Finally, apply some styling product, like hairspray or serum, to hold the style in place and give it a polished finish.

Enjoy experimenting with different styles and finding what works best for you!

Tips for Successful Wig Customization

Practice on a spare wig first to perfect your technique and ensure desired results.

Practice on a spare wig first

Before you begin customizing your favorite wig, it's always a good idea to practice on a spare wig first. This allows you to get comfortable with the process and perfect your techniques before working on the wig you truly want to customize.

By practicing on a spare wig, you can experiment with different highlighting and layering methods without worrying about making mistakes or damaging your desired wig. Plus, it gives you the opportunity to test different colors and styles until you achieve the look you desire.

So don't skip this important step - grab a spare wig and start honing your customization skills today!

Take your time and be patient

Take your time and be patient when customizing your wig. Rushing through the process can lead to mistakes and unsatisfactory results. Remember, it's important to carefully choose the right color for your highlights and take the necessary steps to apply them evenly.

When layering your wig, ensure that you prepare it properly before cutting and blending the layers. By being patient and methodical, you'll achieve a beautifully customized wig that suits your style perfectly.

Always use caution with scissors and chemicals

Always exercise caution when using scissors and chemicals during the wig customization process. Make sure to handle sharp scissors with care to avoid any accidents or injuries. Additionally, be cautious when working with chemical solutions for highlighting or coloring the wig.

Follow the instructions carefully and wear protective gloves to protect your hands from any potential harm. When handling chemicals, work in a well-ventilated area to minimize exposure to fumes.

Safety should always be a top priority when customizing your wig, so take the necessary precautions throughout the process.

Use high-quality products

To achieve the best results when customizing your wig, it's important to use high-quality products. Opt for a highlighting kit that is specifically designed for wigs and will provide vibrant and long-lasting color.

Choose foils that are sturdy and can securely hold your hair sections while allowing the color to develop evenly. Use sharp scissors that are meant for cutting synthetic fibers to ensure clean and precise layering.

When styling, rely on a high-quality wig stand that will support the wig without causing damage or distortion. By using top-notch products, you'll enhance the overall look and durability of your customized wig.

Consider consulting a professional for difficult techniques

If you find that some of the wig customization techniques, such as adding highlights or layering, are too challenging for you to do on your own, it may be worth considering consulting a professional.

They have the expertise and experience to handle difficult techniques with precision and skill. By seeking their assistance, you can ensure that your wig turns out exactly how you envision it.

A professional can also offer personalized advice and recommendations based on your specific needs and preferences. So don't hesitate to reach out if you feel like you need extra guidance in achieving the desired results for your customized wig.

Properly care for your customized wig.

To keep your customized wig looking its best, it's important to care for it properly. First, make sure you store it on a wig stand or in a box when you're not wearing it to help maintain its shape.

When washing your wig, use gentle shampoo and conditioner formulated specifically for synthetic or human hair wigs. Avoid using hot water and vigorously rubbing the wig, as this can cause damage.

Instead, gently comb through the strands with a wide-toothed comb while rinsing out the products. After washing, allow your wig to air dry completely before styling it again. Regular brushing and detangling will also help prevent knots and tangles.

Conclusion

Now that you have learned the techniques for adding highlights and layers to your wig, you can easily customize it to suit your style. With the right tools and a little patience, you can achieve a professional-looking result at home.

So go ahead and unleash your creativity with DIY wig customization!

FAQs

1. What are some tips for adding highlights to a synthetic wig?

Adding highlights to a synthetic wig involves using special techniques for customizing wigs at home, such as using fabric dye and avoiding bleach.

2. Can I add layers to a short wig for added volume?

Absolutely! Layering a short wig could enhance the volume while creating a layered look that's more personalized.

3. How can I customize my black wig with highlights and layers?

You can customize your black wig by cutting some layers in it, then adding highlights carefully into those sections you wish to lighten up.

4. What is the process of layering a synthetic wig for natural look?

Layering a synthetic wig requires careful cutting techniques of varying lengths throughout the hairpiece to achieve dimensional and natural-looking results.

5. Are there any ideas on how I could style my wigs uniquely?

Yes! From adding dimension through colors or textures via highlighting or layering; your creativity is limitless when styling your wigs at home.

Read more

Wigs for Work: Professional Styles for Black Women

Wigs for Work: Professional Styles for Black Women

Are you a black woman exploring wig options for the workplace? Studies indicate that 80% of black women feel pressure to change their natural hair to fit professional settings. This article will ...

Read more